Hair removal
Dermaplaning at CoLaz clinics
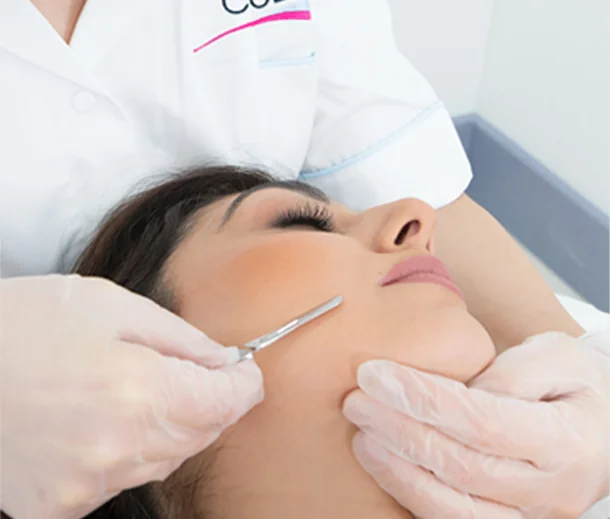
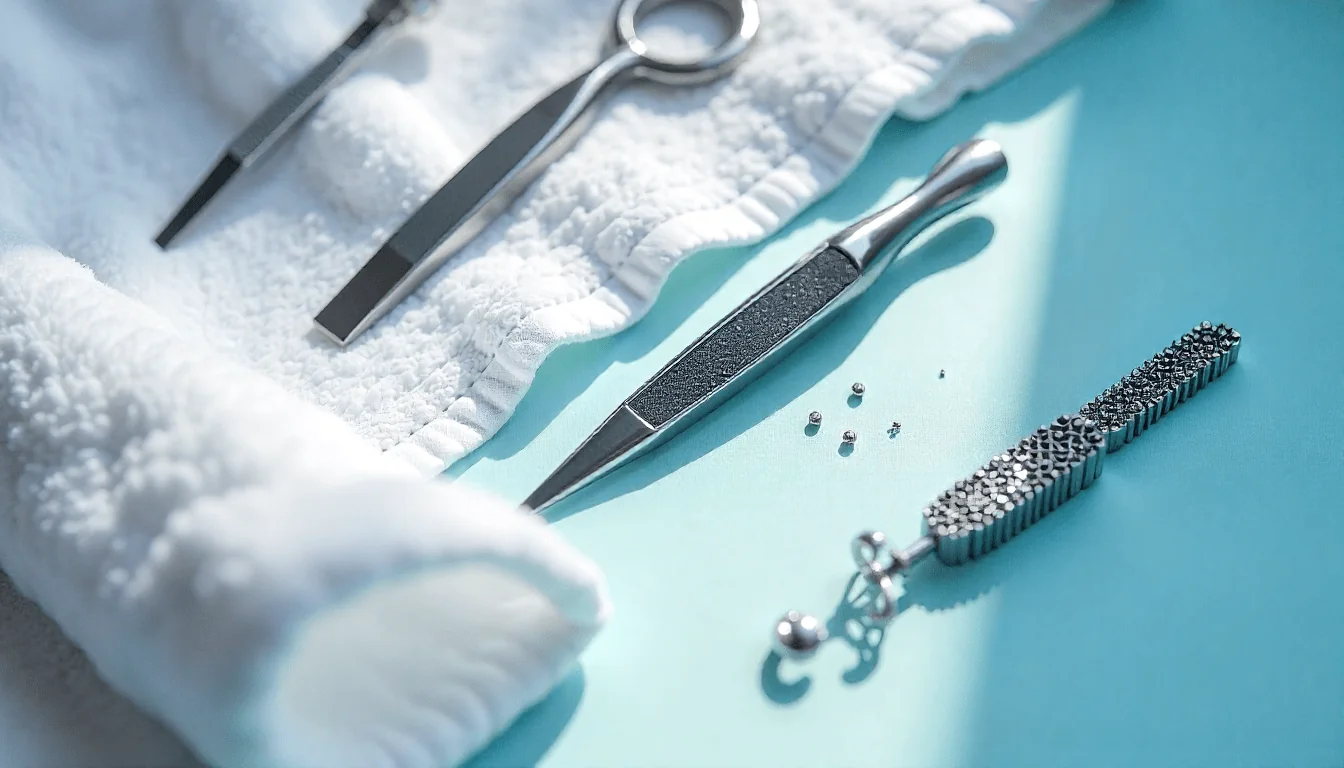
Dermaplaning at CoLaz is a precise manual exfoliation using a single-use sterile surgical blade to remove dead skin cells and fine vellus hair (peach fuzz) from the face. The result is an immediately smoother, brighter surface that takes makeup better, lets skincare absorb deeper, and reflects light evenly for photographs. From £65 per session, across our seven UK clinics, delivered only by trained skin therapists.
From
£65 per session
full face, single session.
- Session time
- ~45 min
- Downtime
- Minimal
- Consultation
- Free
- Locations
- 7 UK clinics
Reply typically within 5 minutes
Or book by email form →Good for
Who books this treatment.
- Dull skin that has lost its natural reflectiveness and looks flat in photographs
- A pre-event smooth finish before a wedding, holiday or photoshoot
- Light, downy facial hair (peach fuzz) that catches the light
- Skin that does not respond well to acid exfoliants or stronger peels
- Patients wanting a no-downtime alternative to chemical exfoliation
- Skin congestion where makeup is clinging to dead surface cells
Aftercare
For the first forty-eight hours.
- Skip exfoliating acids, retinol and vitamin C for forty-eight hours, your skin has already exfoliated
- Apply SPF 50 every morning for the next seven days, the new surface is more photosensitive
- Avoid saunas, steam rooms, sunbeds and intense exercise for twenty-four hours
- Skip heavy makeup for the rest of the day to let the barrier settle
- Stay hydrated and moisturise gently, the skin barrier is briefly more open
What to expect
From your first consultation onwards.
-
01
Free consultation to assess skin type, agree the area and confirm the price in writing
-
02
Skin double-cleansed and prepped with a barrier toner before the blade is opened
-
03
Single-use sterile surgical blade drawn at a 45-degree angle across the skin, in small precise strokes
-
04
Calming mask or hydrating serum applied to settle the freshly exfoliated surface
-
05
Optional SPF 50 and LED light therapy add-on, with written aftercare confirmed before you leave
Dermaplaning is the smoothest exit a patient can take from a forty-five-minute appointment. A clinical surgical blade, drawn precisely across the skin, removes the dead surface layer and the fine peach fuzz that catches the light. The result is an immediate brightness that takes makeup better, lets serums absorb deeper, and photographs cleanly. From £65 per session, across our seven UK clinics.
How dermaplaning actually works
A single-use sterile surgical blade is drawn at a controlled 45-degree angle across the skin in small precise strokes. The blade lifts the top layer of dead skin cells and the fine vellus hair (peach fuzz) on the face. The lower living skin is not touched.
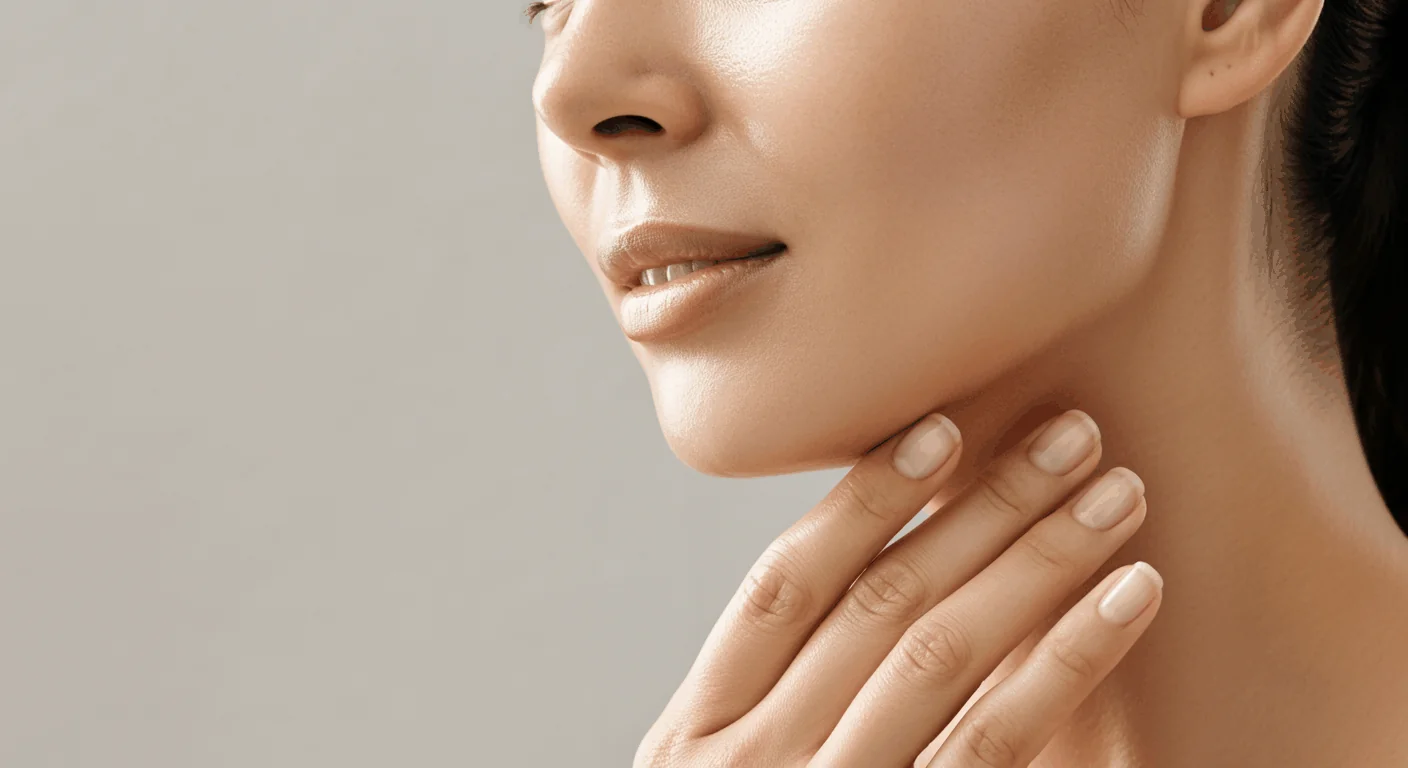
The result is an immediately smoother, brighter surface. Light reflects evenly off the new layer rather than scattering off the dead one, which is why the skin looks lit from within for the next one to two weeks. Makeup applies smoother because there is no fuzz catching it, and topical serums penetrate deeper because the dead barrier has been removed.
Vellus hair returns at the same fine diameter and the same pale colour it had before. It does not grow back thicker or darker, despite the long-running myth.
What a CoLaz session looks like
Every dermaplaning session at CoLaz begins with a free consultation and a double cleanse of the skin. The clinician then prepares the surface with a barrier toner and assesses the skin one more time before opening a fresh single-use blade.
The blade is drawn across the face in small overlapping strokes, working systematically across the cheeks, forehead, jawline and upper lip. The sensation is best described as a feathery stroke on the skin, with no pain and no need for any anaesthetic.
The session closes with a calming mask or a hydrating serum, and an optional LED light therapy or enzyme peel can be added on for a deeper finish. SPF 50 is applied in clinic before you leave.
After your dermaplaning
The skin looks immediately smoother and brighter as you leave the clinic. There is no peeling and no flaking; the dead layer has already been lifted off. The surface can feel slightly tight for the first few hours, which is normal as the barrier settles.
For the next forty-eight hours, skip exfoliating acids, retinol and vitamin C, because the surface has already exfoliated and adding more would over-strip the barrier. Skip heavy makeup for the rest of the day to let the skin settle. Avoid saunas, steam rooms, sunbeds and intense exercise for twenty-four hours.
SPF 50 every morning for the next seven days is non-negotiable because the new surface is more photosensitive. Most patients enjoy the post-treatment glow for one to two weeks, which is why monthly dermaplaning fits neatly into a maintenance schedule.
Available at all seven UK CoLaz clinics
Dermaplaning is delivered at every CoLaz clinic in the UK. Use the clinic finder to choose the location that suits your postcode and schedule, or book a free consultation directly through the link below. Each clinic replies via WhatsApp within five minutes during opening hours.
Often considered alongside
Patients booking dermaplaning often pair it with a Hydrafacial in the same visit for a deeper clinical facial, a diamond peel for a stronger surface exfoliation, chemical peels when pigmentation or texture is the focus, and an oxygen facial for an extra hydration boost after the dermaplane.
Common questions
What patients ask first.
What is dermaplaning and is it different from shaving? +
Dermaplaning is a clinical exfoliation treatment that uses a sterile single-use surgical blade to remove the top layer of dead skin cells together with the fine peach fuzz vellus hair on the surface of the face. It is not shaving in the home sense: the blade type, the angle, the pressure and the technique are clinical. The aim is exfoliation first, with the hair removal as a secondary benefit. The hair grows back at the same fine texture and same colour; it does not grow back thicker or darker, which is a common myth.
Will my hair grow back thicker or darker? +
No. The fine vellus hair on the face is genetically fine and pale, and shaving or dermaplaning the tip does not change the diameter, colour or texture of the hair. The misconception comes from the fact that a freshly cut tip is blunt rather than tapered, which can feel slightly different to the touch for a few days. The hair returns at the same diameter and same colour it had before. Dermaplaning does not remove the follicle, so it is not a permanent hair removal method.
How quickly will I see results from dermaplaning? +
You see the difference immediately. The skin reflects light more evenly, makeup applies smoother because there is no fuzz catching it, and the surface looks brighter for one to two weeks. Many patients book dermaplaning four to seven days before a wedding, photoshoot or event for the strongest photographic finish. For ongoing skin clarity, monthly dermaplaning works well as part of a maintenance facial schedule.
Is there any downtime after dermaplaning? +
There is no downtime in the traditional sense. The skin can look mildly pink for an hour or two after the treatment and feels softer than usual. You can wear makeup the next day, although most patients enjoy the post-treatment glow enough to skip it for forty-eight hours. The freshly exfoliated surface is more photosensitive for a week, which is why SPF 50 daily is non-negotiable for the next seven days.
Who should not have dermaplaning? +
We do not treat patients with active acne breakouts, pustular or cystic spots in the treatment area, active cold sores, eczema flares, recent sunburn or open broken skin. Patients on isotretinoin currently or in the last six months are asked to wait until off-medication. Patients with very deep, very dark or coarse facial hair are usually a better fit for laser hair removal or electrolysis, because dermaplaning is designed for fine vellus hair only.
Can I combine dermaplaning with other treatments? +
Yes. Dermaplaning is often paired with a Hydrafacial or LED light therapy in the same visit, because the fresh exfoliated surface lets the serums and the light penetrate more effectively. It is also used as a prep treatment before a chemical peel for a deeper, more even peel result. We do not combine it with strong acid peels or laser on the same day, and we discuss the right combination at your free consultation.
How much does dermaplaning cost at CoLaz? +
A single full-face dermaplaning treatment is £65 per session. A course of three is £175 and a course of six is £315, which works out to £52.50 per session at the six-session rate. Add-on options including a hydrating mask, LED light therapy or an enzyme peel are priced from £20 to £55 each and are confirmed in writing at your free consultation before any course is booked.
What are the disadvantages of dermaplaning? +
Dermaplaning is low risk in trained hands, but it has limits worth knowing. It exfoliates the surface and removes fine vellus hair only, so it does not treat deep lines, pigmentation or coarse hair, which need other treatments. The results are temporary, lasting one to two weeks, so it works best as regular maintenance rather than a one-off fix. The fresh surface is briefly more sensitive to sun, so daily SPF 50 is essential afterwards. It is also not suitable during active acne, cold sores or eczema flares, which we check at consultation.
Is it a good idea to dermaplane your face? +
For most people wanting smoother, brighter skin and a flawless makeup base, yes. Dermaplaning removes dead surface cells and peach fuzz, so light reflects evenly and serums absorb better, with no downtime and an immediate glow. It suits skin that does not tolerate acids or stronger peels, and it is popular before a wedding, holiday or photoshoot. It is not the right choice if you have active acne, very coarse facial hair or certain skin conditions. Done by a trained therapist with a single-use sterile blade, it is a safe, gentle treatment.
Does dermaplaning grow back stubbly? +
No. The fine vellus hair on the face is genetically fine and pale, and removing the tip with a blade does not change its diameter, colour or texture. A freshly cut tip is blunt rather than tapered, so for a few days it can feel very slightly different to the touch, but it grows back at the same softness and shade as before. Dermaplaning does not stimulate the follicle, so the hair does not come back thicker, darker or stubbly. That belief is one of the most common myths about the treatment.
Still deciding
WhatsApp your nearest clinic. Reply within five minutes.
Where to book
Available at all seven UK clinics.
Start here
Derby
DE23 6PZ · 07533 030599
Visit clinic page
Wembley
HA9 8AF
Paddington
W2 1JQ
Slough
SL1 4XP
Reading
RG30 1AD
Southall
UB1 1NF
Hounslow
TW5 0BY
Often considered alongside
Related treatments.
First to consider
Hydrafacial
Hydrafacial at CoLaz follows the official six-step protocol, detox, cleanse, peel, extract and hydrate, fuse and protect, and LED rejuvenation, adapted into six concern-based bundles, from the thirty-minute Express to the premium JLO Glow.
Skin rejuvenation
Skin rejuvenation
Diamond Peel Treatment
Diamond peel at CoLaz is a precise microdermabrasion using a diamond-coated wand to exfoliate the surface layer of skin and reveal fresher, brighter skin underneath.
Skin rejuvenation
Chemical Skin Peels
Chemical peels at CoLaz are professional-grade acid-based treatments that lift the dull outer layer of skin to reveal brighter, smoother, more even-toned skin underneath.
Skin rejuvenation
Oxygen Facial
Oxygen facial at CoLaz uses pressurised oxygen and a targeted serum infusion to plump, hydrate and brighten skin in a single session.
Begin
Book a free consultation,
without obligation.
Tell us what you would like to change. Your clinician will recommend a plan, confirm the price in writing, and leave the booking to you.
Book a free consultation →